Sunday, January 16, 2022

Setting up WebLogic Cluster and Deploy Application

                 ဒီ article မှာတော့ weblogic cluster တစ်ခု ဘယ်လိုမျိုး တည်ဆောက်မလဲဆိုတာ ပြောပြသွားမှာဖြစ်ပါတယ်။ Cluster တည်ဆောက်ပြီးရင်တော့ application ကို cluster ပေါ်မှာ deploy လုပ်ကြည့်မှာဖြစ်ပါတယ်။

What is weblogic?

                Weblogic ဆိုတာက  ကျွန်တော်တို့ Java based enterprise application တွေ deploy လုပ်ဖို့ရန် အတွက် အသုံးပြုတဲ့ product တစ်ခုဖြစ်ပါတယ်။ Weblogic ကို Oracle မှ ပိုင်ဆိုင်ထားပြီး Weblogic နည်းတူ တစ်ခြား Java based application server product တွေကတော့ Red Hat Jboss, IBM Websphere နဲ့ Tomcat application server တို့ဖြစ်ပါတယ်။ ဒီ Products တွေကို နောက်တစ်နည်းအားဖြင့် middleware servers တွေလို့လဲ ခေါ်ဆိုကြပါတယ်။ သူတို့တွေက authentication, API managing, application messaging ပိုင်း etc. စတာတွေကို handle လုပ်ပေးပါတယ်။ Weblogic ကတော့ လက်ရှိ ကျွန်တော့်ရဲ့ environment မှာ အသုံးများတဲ့အတွက် မှတ်မိအောင် ရေးထားတာဖြစ်ပါတယ်။ Weblogic ကို အကျွမ်းတ၀င် အရမ်းမရှိသေးပါဘူး။


So, what is weblogic cluster?

            Cluster လို့ ဆိုလိုက်တာနဲ့ သိရမှာက reliability, availability  တွေအတွက် ရည်ရွယ်တာဖြစ်ပါတယ်။ တစ်နည်းအားဖြင့် ကိုယ့်ရဲ့ application ကို တစ်ခုထက်ပိုတဲ့ node ပေါ်မှာ deploy လုပ်မှာဖြစ်ပါတယ်။ ဒါမှသာ cluster node 1 down ခဲ့လျှင် node2 ကနေ ဆက်လက်ပြီး handle လုပ်ပေးနိုင်မှာဖြစ်ပါတယ်။ 


Let's get started!!!


What are the prerequisites for weblogic cluster?


1.  2 x VM for node01 and node02.

2. 1xvCPU for each node is ok but better 2xvCPU.

3. RAM 5gb with SWAP 10GB for each node.

4. RockyLinux 8.4 (or) CentOS 8.4

5.  Disk = 60GB (For Both OS+APP)

6, Oracle Weblogic version 12.2.1.4 (edelivery)

7. jdk1.8rpm (not openjdk, must use oracle jdk)

8. Must install libXtst* , libXrender* and xorg-x11-xauth to pop up the installer ( if you are using None GUI OS)

9. Create useraccount called "oracle" and set password

10. Create group called "oinstall" and oracle must be member of oinstall ( Later to use chown -R oracle:oinstall /u01 and chown -R oracle:oinstall /u01/* )

11. Create a seperate directory for weblogic application (Not to mix with OS) /u01


Pls watch WebLogic Video Tutorial on Youtube.

https://www.youtube.com/channel/UCkOi7WxhUBKONv3uD0CvuWw/playlists


That's it!
Thanks and Enjoy Reading!!! :) 
Follow and Like Root Of Info Page and Root Of Info Youtube Channel.


Share:

Friday, November 12, 2021

Understanding Temp Files in Linux - Part 1

                         ဒီ article မှာတော့ Linux system တစ်ခုမှာ ရှိတဲ့ temp files တွေကို ဘယ်လိုမျိုး system က regularly clean up လုပ်လဲဆိုတာ ပြောသွားမှာဖြစ်ပါတယ်။

What is temp files?

                        Temp files တွေဆိုတာကတော့ system ပေါ်မှာ application service တစ်ခုခု ကနေ generate လုပ်လာတဲ့ temp files အမျိုးအစားတွေ ဖြစ်ကောင်းဖြစ်မယ် ဒါမှမဟုတ် system ကိုယ်တိုင်က  generate လုပ်တဲ့ temp files တွေလဲ ဖြစ်မယ်။ တစ်ချို့ temp files တွေက Memory အပေါ်မှာပဲ running ဖြစ်နေပြီး system reboot ဖြစ်သွားတဲ့အခါ မရှိတော့ဘူး တစ်ချို့ temp files တွေကတော့ system ကနေ clean up လုပ်ပေးမှ clear ဖြစ်တဲ့ temp files အမျိုးအစားတွေလဲရှိပါတယ်။ သေချာတာကတော့  ဒီ temp files တွေဆိုတာ system တစ်ခုအတွက် လိုအပ်သလို ဒီ temp files တွေကြောင့်လဲ system ရဲ့ storage space တွေ မလိုအပ်ပဲ waste ဖြစ်နိုင်ပါတယ်။ ဒါကြောင့် Linux or Windows မှာပဲဖြစ်ဖြစ် ဒီ temp files တွေကို clean up လုပ်ဖို့အတွက် လိုအပ်ပါတယ်။ 

Where are the tmp files located ?

                        Linux မှာတော့ temp files တွေကို  ဒီ directories  "/var/tmp", "/tmp", "/run" တွေ အောက်မှာ default အားဖြင့် တွေ့ရပြီး "/run" directory အောက်မှာရှိတဲ့ temp files တွေကတော့  across reboot မှာ persistent မဖြစ်ပါဘူး။ "/var/tmp" and "/tmp" directory တွေမှာရှိတဲ့ temp files တွေကတော့ သူ့ရဲ့ အချိန်ကာလတစ်ခုအထိ system ပေါ်မှာ persistent ရှိနေမှာဖြစ်ပါတယ်။ 

Who is responsible for cleaning up the temp files?

                        ဆိုတော့ ဒီ persistent ဖြစ်တဲ့ temp files တွေကို ဘယ်သူက တာ၀န်ယူပေးလဲဆိုရင်  "systemd-tempfiles" က တာ၀န်ယူပေးပါတယ်။ အောက်ပုံမှာ systemd-tempfiles နဲ့ပတ်သတ်တာတွေကို ပြထားပေးပါတယ်။

                        "systemd-tempfiles" ကမှတစ်ဆင့် "systemd-tmpfiles-clean.timer" မှာ ဘယ်အချိန်မှာတော့ clean up လုပ်ပါဆိုပြီး schedule သတ်မှတ်ကာ schedule သတ်မှတ်သည့်အတိုင်း ကို "systemd-tmpfiles-clean.service" က clean up လုပ်ပေးပါတယ်။ 

Let's see the current config of systemd-tmpfiles-clean.timer

                    အောက်ပုံမှာပြထားသည့်အတိုင်း "systemd-tmpfiles-clean.timer" ရဲ့ config ကိုကြည့်ရင် [Timer] ဆိုတဲ့ section အောက်မှာ "OnBootSec=15min"  ဆိုတာကတော့ System boot တက်ပြီးပြီးချင်း "15min" နေရင် temp files တွေကို clean up စတင်လုပ်ဆောင်မယ်လို့ ပြောတာဖြစ်ပြီး  "OnUnitActive=1d" ကတော့နောက်ထပ် clean up process ကို 24hr ကျော်ပြီးနောက်မှာ ထပ်ပြီး run မယ်လို့ ပြောတာဖြစ်ပါတယ်။ လက်ရှိ config ကို ပြင်ချင်ရင်တော့ "/usr/lib/systemd/system/systemd-tmpfiles-clean.timer" ထဲမှာ ၀င်ပြင်ရမှာဖြစ်ပါတယ်။


So, Where is the configurations file for systemd-tmpfiles?

                    Systemd-tmpfiles ကို အသုံးပြုပြီး temp files တွေကို ရှင်းလင်းဖို့အတွက် configuration files တွေကို ဘယ်နေရာမှာသိမ်းထားလဲဆိုရင် အရင်ဆုံး "man tmpfiles.d" ကို ဖွင့်ကြည့်မယ်။ အဲ့ဒီမှာ "SYNOPSIS Section" အောက်မှာ ဖော်ပြထားတဲ့ 

1. /etc/tmpfiles.d/

2. /run/tmpfiles.d/

3. /usr/lib/tmpfiles.d/ 

ဆိုတဲ့ directories တွေအောက်မှာ systemd-tmpfiles အတွက် configuration files တွေကို ထားရှိပါတယ်။ အဲ့ဒီ့ configuration တွေကို systemd-tmpfiles က ယူသုံးပြီး clean up ပြုလုပ်ပေးတာဖြစ်ပါတယ်။ System က first priority အနေနဲ့ /etc/tmpfiles.d အောက်မှာရှိတဲ့ config files တွေကို ကြည့်မှာဖြစ်ပြီး အကယ်၍  နာမည် တူ config file ကို /etc/tmpfiles.d နဲ့ တစ်ခြား နှစ်ခုမှာလဲ ရှိနေခဲ့ရင် /etc/tmpfiles.d မှာ သတ်မှတ်ထားတဲ့ config က overwrite လုပ်နိုင်ပါတယ်။ 2nd priority အနေနဲ့ "/run/tmpfiles.d" ဖြစ်ပြီး last priority ကတော့ "/usr/lib/tmpfiles.d" အောက်မှာ ရှိတဲ့ config files တွေဖြစ်ပါတယ်။

Let's take a look at these directories

                        လက်ရှိမှာတော့ "/etc/tmpfiles.d" နဲ့  "/run/tmpfiles.d" directories အောက်မှာ config files တွေ သိပ်မရှိသေးဘူး။ "/usr/lib/tmpfiles.d" directory အောက်မှာတော့ temp files clean up လုပ်ဖို့အတွက် configuration files တော်တော်များများကို တွေ့ရမှာပါ။ Sample အနေနဲ့ "/var/tmp" and "/tmp" directory တွေအတွက် define လုပ်ထားတဲ့ "tmp.conf" config file ကို ကြည့်မယ်ဆိုရင် 

1. q /tmp 1777 root root 10d = /tmp directory အောက်မှာ ရှိတဲ့ files တွေကို 10 days ကျော်ရင်  clean လုပ်ဖို့ ညွှန်ကြားထားတာဖြစ်ပြီး

2. q /var/tmp 1777 root root 30d = /var/tmp directory အောက်က files တွေကိုတော့ ရက် ၃၀ ကျော်ရင် clean လုပ်ဖို့ define လုပ်ပေးထားတာဖြစ်ပါတယ်။


                    Part-1 ကို ဒီလောက်နဲ့ပဲရပ်ထားပြီး Part-2 မှာတော့ config file မှာသုံးထားတဲ့ syntax ပုံစံတွေ နောက် temp files တွေ အတွက် custom directory ဘယ်လို တည်ဆောက်မလဲ, auto and manul temp files cleaning လုပ်ပုံတွေကို ဆက်သွားပါမယ်။

That's it!
Thanks and Enjoy Reading!!! :) 
Follow and Like Root Of Info Page and Root Of Info Youtube Channel.

Share:

Sunday, October 17, 2021

Ansible in the house - Episode - 2

                   Control node မှာ Ansible installation လုပ်ပြီးသွားပြီဆိုရင်တော့ ကျွန်တော်တို့ ansible ကို အသုံးပြုပြီး nodes တွေကို စတင် test လုပ်ကြည့်ကျမယ်။ အရင်ဆုံး ansible ကနေ လှမ်းပြီး manage လုပ်ဖို့အတွက် သူ့မှာ inventory list ရှိရပါတယ်။

What and Where is ansible inventory?

         Inventory ဆိုတာကတော့ single node or a collection of nodes တွေ ထည့်သွင်းထားတဲ့ file တစ်ခု ဖြစ်တယ်။ Ansible ကို အသုံးပြုဖို့အတွက် ဒီ inventory file လိုအပ်တယ်။ ဒီ Inventory file ထဲမှာ ထည့်သွင်းထားတဲ့ nodes တွေကိုမှ ansible ကနေ manage လုပ်နိုင်မှာဖြစ်ပါတယ်။ Ansible Inventory file ရဲ့ default location ကတော့ "/etc/ansible" directory အောက်မှာရှိတဲ့ "hosts" file ဖြစ်ပါတယ်။  အောက်ပုံမှာဆိုရင် host file ထဲမှာ ansible ကနေ manage လုပ်မယ့် node ip address  <or> hostname ကို lable name "test" ရဲ့အောက်မှာ ထည့်သွင်းထားပါတယ်။


           အိုကေ, အခုဆိုရင် ansible အသုံးပြုဖို့အတွက် inventory list မှာလဲ node တစ်ခုထည့်သွင်းပြီးပြီ။ ဒါဆိုရင် ansible ကို စမ်းသုံးကြည့်ရအောင်။ ပထမဦးဆုံး အနေနဲ့ ansible ကို အသုံးပြုပြီး တော့ remote server ကို "ping" လုပ်ကြည့်မယ်။ ပုံမှန်ဆိုရင် server ကို ssh access ၀င်ပြီးတော့မှ ပြုလုပ်လို့ရတာတွေကို ansible ကိုအသုံးပြုပြီး control node ကနေ manage လုပ်သွားမှာဖြစ်ပါတယ်။ 
           အောက်ပုံမှာ ဆိုရင်  ansible ရဲ့ "ping module" ကိုသုံးပြီး remote server နဲ့ connection ရှိမရှိ  ping ကြည့်တာဖြစ်ပါတယ်။ အသုံးပြုသွားတဲ့ command options တွေကတော့ "test" က hosts file ထဲမှာ သတ်မှတ်ထားတဲ့ remote server ရဲ့ label name, "-m ping" ဆိုတာက ping module ကို အသုံးပြုမယ်လို့ ပြောတာဖြစ်ပြီး ဒီနေရာမှာ " -u root" ဆိုတာက ဒီ ping task ကို remote server ဖက်မှာ ဘယ် user နဲ့ execute လုပ်မလဲဆိုတာ သတ်မှတ်တာ ဖြစ်တယ်။ "-k" ဆိုတာကတော့ လောလောဆယ်မှာ ansible control node နဲ့ remote server ကြားမှာ passwordless ssh (key-based authentication) မလုပ်ရသေးတဲ့ အတွက်  ansible command ကို execute လုပ်တဲ့အခါမှာ "-k" option ကို ssh connection အတွက် ထည့်သွင်း ပေးရတာဖြစ်ပါတယ်။ 


          နောက်ထပ် Example တစ်ခုကိုတော့ remote server ရဲ့ ram utilization ကို ကြည့်ကြည့်မယ် နောက်ပြီး disk information ကို ကြည့်ကြည့်မယ်။ အောက်ပုံမှာ သုံးသွားတဲ့ command options တွေထဲက အပေါ်မှာ သုံးသွားတာနဲ့ မတူညီတာဆိုရင် "-i" ဆိုတာက inventory file location ကို ကျွန်တော်တို့က default ဖြစ်တဲ့ "/etc/ansible" အောက်မှာ မသုံးပဲနဲ့ customzie သုံးချင်ရင် "-i" ကို ထည့်ပေးရတယ်။ ပြောချင်တာက "/etc/ansible" directory အောက်မှ ဖြစ်စရာမလိုဘူးကြိုက်တဲ့ နေရာမှာ သတ်မှတ်နိုင်ပါတယ်။ နောက်တစ်ခု ဖြစ်တဲ့ "-a" ဆိုတာက "module arguments" ဖြစ်ပြီး သူ့နောက်မှာ ကိုယ်ကသုံးချင်တဲ့ commands တွေ ရိုက်ထည့်ပေးနိုင်တယ်။


          နောက်ထပ် example တစ်ခုအနေနဲ့ ကတော့ "-v [verbose]" options ကို အသုံးပြုတာဖြစ်ပါတယ်။ အကယ်၍ ansible run တဲ့အခါမှာ error တက်သွားတာပဲ ဖြစ်ဖြစ် ansible run ထဲ process ကို details ကြည့်ချင်တဲ့ အခါမှာ "-v" option ကို ထည့်သွင်း အသုံးပြုပါတယ်။ Verbose " -v " တစ်ခုထည့် ပိုပြီး အသုံးပြုရင် output details ပိုပြပေးမှာဖြစ်ပါတယ်။ အခု ကျွန်တော်တို့ လုပ်ကြည့် သွားတာတွေကို ansible မှာ "ad-hoc" command တွေလို့ ခေါ်ပါတယ်။ တစ်နည်းအားဖြင့် playbooks မတည်ဆောက်ပဲ terminal ပေါ်မှာပဲ ansible ကို တိုက်ရိုက် ခေါ်သုံးတဲ့ ပုံစံမျိုးဖြစ်ပါတယ်။ Ansible Playbooks အပိုင်းကိုတော့ နောက်ပိုင်း Episode တွေမှာ လေ့လာကြတာပေါ့။ 


Let's set up ssh key-based authentication 


           အခု အပေါ်မှာ တောက်လျှောက် စမ်းလာခဲ့သမျှ ssh passworkd အတွက် "-k" ကို သုံးလာခဲ့တယ်။ အခု ssh key based ကို အသုံးပြုလိုက်မယ်ဆိုရင် ansible run တဲ့အခါမှာ password less method နဲ့ run သွားမှာဖြစ်ပါတယ်။ အောက်ပုံမှာဆိုရင် ssh-keygen ဖြင့် control node မှာ key generate လုပ်စေပြီး တစ်ဖက် remote server ထဲသို့ ssh-copy-id command ဖြင့် authorization input သွားထည့်ပေးတာဖြစ်ပါတယ်။ ဒါဆိုရင် ansible ကို run ကြည့်ရင် ssh connection အတွက် option "-k" ထည့်စရာမလိုတော့ပဲ run သွားမှာဖြစ်ပါတယ်။


Let's play some more on ansible ad-hoc

Install "httpd" package with ansible

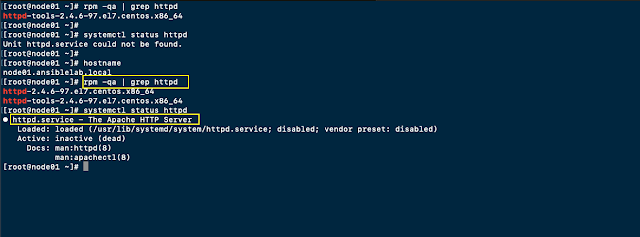
          Ansible ad-hoc command ဖြင့် http package install လုပ်ကြည့်မယ်။ Package install ပြုလုပ်ဖို့ အတွက် အသုံးပြုရမယ့် module က "yum" module ဖြစ်ပါတယ်။ သုံးထားတဲ့ options တွေကတော့ "name=httpd" install လုပ်မယ့် package name ကိုသတ်မှတ်တာဖြစ်ပြီး "state=present" ကတော့ http package သည် system ပေါ်မှာ တစ်ကယ် ရှိမရှိ စစ်ပေးတာဖြစ်ပါတယ်။ "state=absent" ကိုတော့ package remove လုပ်ရာမှာ သတ်မှတ်ပေးရပါတယ်။ "state:latest" ဆိုရင်တော့ package install လုပ်ရမှာ latest version ကို ရွေးပြီး install ပြုလုပ်မှာဖြစ်ပါတယ်။


                နောက်ထပ်တစ်ခေါက် ထပ် run တဲ့ အခါမှာ remote server မှာ "http" package installed ပြီးသွား ပြီမို့လို့ ansible အနေနဲ ဘာမှ ထပ်မလုပ်တော့ပဲ output မှာ "http already installed" ဆိုပြီး ပြပေးတာဖြစ်ပါတယ်။


Start "httpd" service with ansible ad-hoc


                Package install လုပ်ပြီး သွားပြီးနောက် service ကို start လုပ်ကြည့်မယ်။ အသုံးပြုသွားတဲ့ options တွေက တော့ "name=httpd" httpd service ကို "state=started" start လုပ်မယ် ပြီးရင် reboot ချခဲ့ရင်လဲ persistent ဖြစ်အောင် "enabled=yes" လုပ်မယ်လို့ အသုံးပြုသွားတာဖြစ်ပါတယ်။ အခုလို ပုံစံမျိုးကိုပဲ "state=stopped/restarted" လဲ အသုံးပြုလို့ရပါတယ်။


Let's copy a index.html to remote server


                အခုဆို remote server ဖက်ခြမ်းမှာ web services install လုပ်ပြီးပြီ service လဲ start ဖြစ်နေပြီ။ ဒါဆို နောက်တစ်ဆင့် အနေနဲ့  ansible ရဲ့ "copy" module ကို အသုံးပြုပြီး remote server ရဲ့ "/var/www/html" directory အောက်မှာ "index.html" file ကို control node ကနေ copy ကူးပြီး သွားထားပေးမယ့် ပုံစံဖြစ်ပါတယ်။ဒီနေရာမှာ အသုံးပြုထားတဲ့ ansible options တွေကတော့ " -m copy" copy module ကို အသုံးပြုမယ် "src=/root/index.html" source location က file ကို သတ်မှတ်ထားတယ် "dest=/var/www/html" remote server ဖက်ခြမ်းရဲ့ /var/www/html အောက်မှာ သွားထားပေးမယ်။ copy ကူးပြီးသွားရင် "httpd" service ကို restart ချဖို့ အတွက် "state=restarted" option ကို အသုံးပြုရပါမယ်။ 


                Service restart ချပြီးရင်တော့ remote server ရဲ့ website ကို လှမ်းခေါ်ဖို့ အတွက် firewall မှာ http port ဖွင့်ပေးရပါမယ်။ လိုအပ်တဲ့ port တွေ ဖွင့် ဖို့ အတွက် ansible ရဲ့ firewalld module ကို အသုံးပြုရပါမယ်။ အောက်ပုံမှာ firewalld module ရဲ့ options တွေကတော့ "service=http" allow လုပ်မယ့် service name သတ်မှတ်တယ် "permanent=yes" permanent rule ဖြစ်မယ် "state=enabled" state ကတော့ ဒီ allow rule ကို active ဖြစ်မယ်လို့ သတ်မှတ်တာဖြစ်ပါတယ်။ အကယ်၍ firewall rule ကို remove ပြန်လုပ်ချင်ရင်တော့ "state=disabled" ဆိုပြီး သတ်မှတ်ပေးရမှာဖြစ်ပါတယ်။ Firewall rule သတ်မှတ် ပေးပြီးတဲ့နောက် "shell" module ကို အသုံးပြုပြီး "firewall-cmd --reload" command ဖြင့် allow rule effect ဖြစ်အောင် လုပ်မယ်။ ဒါဆိုရင်တော့ curl ဖြင့်  ခေါ်ကြည့်လျှင် remote server ရဲ့ website ကျလာပြီ ဖြစ်ပါတယ်။


Let's create users and groups with ansible ad-hoc


                နောက်ထပ်တစ်ခုအနေနဲ့ ansible ad-hoc command ဖြင့် users/groups တွေ create လုပ်ကြည့်မယ်။ အသုံးပြုမယ့် module တွေကတော့ "user" module နဲ့ "group" module ဖြစ်ပါတယ်။ အောက်ပုံမှာဆိုရင် group တစ်ခု အရင်ဖွဲ့တယ် ပြီးတော့ user account တစ်ခုဖွဲ့ပြီး အဲ့ဒီ user account ထဲကို groups တွေပါ ထပ်ပေါင်းထည့်ဖို့အတွက် "groups=[groupname]" and "append=yes" ဆိုပြီ သတ်မှတ်ရပါတယ်။ "append=yes" မသုံးရင် existing group ကို overwrite လုပ်သွားမှာ ဖြစ်ပါတယ်။


                ဒါကတော့ Ansible in the house episode-2 ဖြစ်ပါတယ်။ ဒီ Episode -2 မှာတော့ ansible ad-hoc commands ဖြင့် package installed, service start/stop, firewall rules တွေ users/groups creating တွေကို အသုံးပြုသွားပါတယ်။ 

That's it!
Thanks and Enjoy Reading!!! :) 
Follow and Like Root Of Info Page and Root Of Info Youtube Channel.


Share:

Sunday, October 10, 2021

Ansible in the house - Episode - 1

                    Ansible in the house series ကို ansible နဲ့ ပတ်သတ်ပြီး လေ့လာ ရင်းနဲ့  ရေးသွားမှာပါ။ ဆိုတော့ စလိုက်ရအောင်  ansible ဆိုတာကတော့ automation tool တစ်ခု ဖြစ်ပါတယ်။  အဓိပ္ပါယ် ကတော့ human effort ကို manual intervention ပိုင်းမှာအများကြီး အသုံးမပြုပဲ control ပိုင်းလောက်ပဲ သုံးပြီး ကျန်တာတွေကိုတော့ automatic အလုပ်လုပ်ခိုင်းဖို့အတွက် အသုံးပြုတဲ့ tool တစ်ခုဖြစ်ပါတယ်။ ဥပမာအနေ နဲ့ system admin သမားတစ်ယောက်အတွက် day to day tasks တွေကို servers အရေအတွက်နည်းရင်တော့ ပြသာနာမရှိပေမယ့် serversအများအပြား ကို တစ်ခုချင်းစီ လိုက်ပြီး manage လုပ်နိုင်ဖို့ ခဲယဥ်းတဲ့ အခြေနေမျိုးတွေမှာ လိုအပ်တဲ့ daily tasks တွေကို automatically handle လုပ်နိုင်ဖို့ ansible ကို အသုံးပြုနိုင်ပါတယ်။

                   ဆိုတော့ တစ်ခြား popular automation tools တွေ ဖြစ်တဲ့ Puppet, chef, saltstack တို့ထက် ansible မှာ သူရဲ့ အဓိက ကောင်းတဲ့ အချက်ကတော့ human readeable ဖြစ်တဲ့ YAML lanaguage ကို အသုံးပြုထားတယ် နောက်ပြီးတော့  ansible control node နဲ့ ansible ကနေ managed လုပ်မယ့် nodes တွေ ဆက်သွယ်ဖို့ အတွက်လဲ additional software (i.e agents) တွေ သွင်းစရာမလိုပဲ "ssh" connection ပေါ်မှာပဲ အလုပ်လုပ်နိုင်တာကလဲ ansible ရဲ့ အားသာစေတဲ့ အချက်လဲ ဖြစ်ပါတယ်။

                     ansible သည် python language ကိုအသုံးပြုထားတဲ့ automation tool တစ်ခုဖြစ်ပါတယ်။ ဒါကြောင့် prerequisities အနေနဲ့ system ပေါ်မှာ Python version အနည်းဆုံး python 2 ဆိုရင် 2.6 or later, python 3 ဆိုရင် version 3.5 or later  ရှိရပါမယ်။ ဒါဆိုရင်တော့ ansible ကို အသုံးပြုနိုင်ပါတယ်။ ansible ဖြင့်  Linux/Unix အပြင် Windows platform တွေကိုပါ manage လုပ်နိုင်ပါတယ်။

Let's install ansible on control node

                    ဒီ Epsiode-1 မှာတော့ ansible ကို  control node မှာ installation အရင်ပြုလုပ်သွားပါမယ်။ Ansible ကို Linux distro (i.e ubuntu, red hat, centos) တွေမှာ install လုပ်နိုင်သလို Mac OS နဲ့ Windows မှာလဲ install ပြုလုပ်နိုင်ပါတယ်။ 

Install ansible on Ubuntu

                    Ubuntu မှာဆိုရင် ansible install လုပ်ဖို့အတွက် ansible PPA ကို system မှာ အရင်ထည့်သွင်းပြီးမှ install လုပ်နိုင်ပါတယ်။ အောက်ပုံမှာတော့ Ubuntu distro မှာ ansible installation ကို ပြုလုပ်ပြထားပါတယ်။


Install Ansible on RHEL8

                RHEL ပေါ်မှာ ansible install ပြုလုပ်ဖို့ဆိုရင်တော့ အရင်ဆုံး red hat subscription ရှိရပါမယ်။ Red Hat  subscription ရှိမှသာ ansible ကို red hat official repositories တွေမှတစ်ဆင့် install ပြုလုပ်နိုင်မှာဖြစ်ပါတယ်။ Ansible ကို install ပြုလုပ်ဖို့အတွက် "ansible-2.9-for-rhel-8-x86_64-rpms" repository ကို enable အရင် ပြုလုပ်ပြီးမှ install လုပ်နိုင်ပါမယ်။ Red Hat ကနေ free ပေးထားတဲ့  Red Hat Developer Subscription ကို RHEL မှာ register လုပ်ပြီး အသုံးပြုနိုင်ပါတယ်။ အောက်ပုံမှာ ansible ကို RHEL8 အပေါ်မှာ installation ပြုလုပ်ပြထားပါတယ်။ 


Install Ansible on CentOS7/8

                 Community distro ဖြစ်တဲ့ CentOS မှာဆိုရင်တော့ ansible သွင်းဖို့အတွက် epel repository လိုအပ်ပါတယ်။ အောက်ပုံမှာ epel repository ကို ထည့်သွင်းပြီး ansible installation လုပ်ပြထားပါတယ်။


Install Ansible on MacOS

                MacOS အပေါ်မှာ ansible ကို installation ပြုလုပ်ချင်ရင်တော့ အရင်ဆုံး mac os ရဲ့ package manager ဖြစ်တဲ့ "brew" ကို install အရင်လုပ်ရပါမယ်။ "Brew" package manager install လုပ်ပြီးမှ brew ကနေတစ်ဆင့် ansible ကို သွင်းရမှာဖြစ်ပါတယ်။ အောက်ပုံမှာတော့ "brew" ဖြင့် ansible ကို installation ပြုလုပ်ပြထားပါတယ်။ 


Install ansible on Windows

            Windows အပေါ်မှာ ansible ကို အသုံးပြုဖို့အတွက် အကောင်းဆုံး methods တွေကတော့ WSL (Windows Sub-System for Linux) ကို သွင်းပြီး အဲ့အပေါ်ကနေ ansible ကို install ပြုလုပ်နိုင်ပါတယ်။ WSL မဟုတ်လဲ Linux VM on VirtualBox/Vmware Workstation (or) Cygwin လို့ခေါ်တဲ့ windows ပေါ်မှာ unix/linux commands တွေကို အသုံးပြုနိုင်တဲ့ application အပေါ်ကနေ ansible ကို install ပြုလုပ်နိုင်ပါတယ်။

Ok, ဒီ article လေးကတော့ ansible in the house ရဲ့ episode-1 ဖြစ်ပါတယ်။

That's it!
Thanks and Enjoy Reading!!! :) 
Follow and Like Root Of Info Page and Root Of Info Youtube Channel.
Share:

Monday, October 4, 2021

Installing CVEs (Common Vulnerabilities and Exposures) updates on RHEL

                         ဒီ article မှာတော့  မိမိရဲ့ environment မှာ RHEL ကို official သုံးထားရင် Red Hat ဆီက နေ Security နဲ့ ပတ်သတ်တဲ့ update တွေရပါတယ်။ ဒီ security update တွေကို ဘယ်လို မျိုး မိမိ ရဲ့ system ပေါ်မှာ install  ပြုလုပ်မလဲ ကို ရှင်းပြသွားမှာဖြစ်ပါတယ်။ Security updates တွေဆိုရင်တော့ တစ်ခြား updates တွေထက် ပိုပြီး  priority အရ အလေးထား ရမှာဖြစ်ပါတယ်။ လိုအပ်ရင်လိုအပ်သလို update ပြုလုပ်ပေးဖို့ လိုအပ်ပါတယ်။

What is CVE ?

            CVE ဆိုတာက system တွေမှာ ရှိတဲ့ security flaws တွေ အားနည်းချက်တွေကို security advisors တွေ experts တွေက တစ်ဆင့်  company တွေ vendors တွေ awareness ဖြစ်အောင် ထောက်ပြတဲ့ အဖွဲ့အစည်း ဖြစ်ပါတယ်။ မိမိ system မှာ ရှိနေတဲ့ security flaws တွေ ကို CVE id နဲ့ ပြသပေးပါတယ်။ ဒီ CVE ကို အခြေခံပြီး လိုအပ်တဲ့ security updates တွေကို ပြုလုပ်ပေးရမှာဖြစ်ပါတယ်။


1. Let's check the system

                အရင်ဆုံး system မှာ update တွေ သွင်းဖို့လိုနေပြီးလား security updates တွေ လိုအပ်နေပြီလား ဆိုတာ ကို "yum updateinfo" နဲ့ ကြည့်နိင်ပါတယ်။ အောက်ပုံမှာဆိုရင်တော့ Security အပိုင်းမှာ Important/ Moderate and Low ဆိုပြီး security level အလိုက် update လုပ်ဖို့ လိုနေတာတွေကို တွေ့ မှာဖြစ်ပါတယ်။ 


               Security updates info သီးသန့် ပဲ ကြည့်ချင်ရင်တော့ "yum updateinfo --security" ဆိုပြီး ကြည့်နိုင်ပါတယ်။


                   လက်ရှိ security updates category ထဲကနေ ကိုယ်က updates list တွေကို details ကြည့်ချင်တယ်ဆိုရင် "yum updateinfo info --sec-severity" command ကို အသုံးပြုပြီး ကြည့်နိုင်ပါတယ်။ အောက်ပုံမှာတော့ "Moderate security" ထဲက details update list တွေကို ဘယ်လိုကြည့်လဲဆိုတာ ပြပေးထားပါတယ်။


2. Let's install the security patches


                အခုဆိုရင် system မှာ security updates တွေ ကို patching လုပ်မှာဖြစ်ပါတယ်။ အကယ်၍ ကိုယ်က specific security ကိုပဲ patch လုပ်ချင်တယ်ဆိုရင် "yum update --cves <CVE-ID>" command ဖြင့် install လုပ်နိုင်သလို RHSA-ID ကို အသုံးပြုပြီးတော့လဲ patching ပြုလုပ်နိုင်ပါတယ်။ အောက်ပုံမှာ CVE-ID and RHSA-ID နှစ်ခုစလုံးကို အသုံးပြုထားပါတယ်။ 


            Security updates အကုန်လုံးကို install လုပ်ချင်ရင်တော့ "yum update --security" ကိုအသုံးပြုနိုင်ပါတယ်။ System ကို reboot ချပြီး "yum updateinfo --security" နဲ့ ပြန် check ကြည့်ရင် အပေါ်မှာ ပြခဲ့တဲ့ security patches တွေ အကုန် install လုပ်သွားတာ တွေ့ရမှာဖြစ်ပါတယ်။


        အခု​ကတော့ RHEL systems တွေပေါ်မှာ Security updates တွေကို ဘယ်လိုမျိုး install လုပ်မလဲဆိုတဲ article ဖြစ်ပါတယ်။ 


That's it 😊


Pls Like and Subscribe Our Root Of Info FB Page and Youtube Channel


Thank you!!!

Share:

Sunday, September 26, 2021

What I learned about Kubernetes - (Scheduling - Static Pod)

                ဒီ article မှာတော့ ကျွန်တော်တို့ scheduling ရဲ့ အဆက်ဖြစ်တဲ့ static pod အကြောင်းလေ့လာကြည့်မယ်။ 

So, What's static pod?

                Static pod ဆိုတာက kubernetes cluster အတွင်းမှာရှိမနေဘူး တစ်နည်းအားဖြင့် kubernetes ရဲ့ api server (control plane) နဲ့ တည်ဆောက်ထားတာမဟုတ်ပဲ kublet နဲ့ပဲ တည်ဆောက်ထားတာ ဖြစ်ပါတယ်။ တစ်နည်းအားဖြင့် kublet + docker (underlying container service) = static pod ဖြစ်ပါတယ်။ Kubernetes ရဲ့ control plane componentes တွေနဲ ့ တည်ဆောက်ထားတာ မဟုတ်တဲ့ အတွက် static pod ကို deployment တို့ replicasets type လိုမျိုး တည်ဆောက်လို့ မရပါဘူး။ Static pods တွေကို /etc/kubernetes/manifests directory အောက်မှာ တည်ဆောက် နိုင်ပါတယ်။ Definition file (yaml) ကို /etc/kubernetes/manifests directory အောက်မှာ ထားလိုက်တာနဲ့ kubectl create သုံးစရာမလိုပဲ pod create လုပ်သွားမှာဖြစ်ပါတယ်။ Static pod တွေ create လုပ်ပြီးတဲ့ အခါမှာလဲ ကြည့်တဲ့ အခါ kubectl get pods နဲ့ ကြည့်နိုင်သလို docker ps command ဖြင့် ကြည့်နိုင်ပါတယ်။ 

Let's create a static pod

             ဒီမှာတော့ nginx pod yaml file တစ်ခု ကို  create လုပ်ပြီး /etc/kubernetes/manifests အောက်မှာ သွားထားမှာဖြစ်ပါတယ်။ /etc/kubernetes/manifests အောက်ထားပြီးတာနဲ့ kubectl get pods (or) docker ps ဖြင့် ခေါ်ကြည့်တဲ့ အခါ nginx-staticpod တစ်ခု running ဖြစ်နေတာ တွေ့မှာ ဖြစ်ပါတယ်။ kubectl command ကို သုံးပြီး static pod ကို edit ၀င်ပြင်ဆင်လို့ မရပါဘူး။ Static pod ကို delete လုပ်ချင်ရင်တော့  /etc/kubernetes/manifests အောက်က staticpod yaml file ကို ဖျက်ရမှာ ဖြစ်ပါတယ်။ 


အိုကေ, ဒီ article ကတော့ scheduling session ရဲ့ staticpod အကြောင်းဖြစ်ပါတယ်။

That's it 😊


Pls Like and Subscribe Our Root Of Info FB Page and Youtube Channel


Thank you!!!


Share:

What I learned about Kubernetes - (Scheduling - DaemonSets)

                 ဒီ article ကလဲ​ scheduling ရဲ့ အဆက်ပဲဖြစ်ပြီး daemonsets, static pods တို့အကြောင်းကို လေ့လာမှာဖြစ်ပါတယ်။ အရင်ဆုံး daemonsets အကြောင်း ပြောကြမယ်။ 

What is daemonsets?

                Daemonsets ရဲ့ အလုပ်လုပ်ပုံက deployment တို့ replicaset တို့လိုပဲ pods တွေကို multiple nodes တွေပေါ်မှာ တည်ဆောက်ပေးပါတယ်။ ကွဲပြား သွားတဲ့ အချက်ကတော့ daemonsets pod တွေက အဓိက အားဖြင့် monitoring, log collecting and network communication between nodes တွေ အတွက် အဓိက ထားအသုံးပြုပါတယ်။ ဥပမာ ရုံးက end-users တွေရဲ့ computers မှာ virus မ၀င်အောင် ကာကွယ်တဲ့ အနေနဲ့ endpoint security ( kaspersky endpoint security တို့ , trendmicro, etc) စသည်ဖြင့် သုံးကြတယ်။ ရုံး အနေနဲ့ ဒီ users တွေရဲ့ PC တွေ ကို တစ်ခု ချင်းစီ လိုက် manage လုပ်ဖို့က မဖြစ်နိုင်ဘူး အဲ့ဒီ အခါမှာ endpoint security agent လေးတွေ ကို PC တိုင်းမှာ install လုပ်တယ် ပြီးတော့မှ endpoint security server ကနေ တစ်ဆင့် monitor လုပ်တယ် update လုပ်တယ် logs တွေ collect စသည်ဖြင့် လုပ်ကြတာဖြစ်ပါတယ်။ အခု daemon set ရဲ့ အလုပ်လုပ်ပုံ ကလဲ​ အလားတူပဲ kubernetes nodes တွေပေါ်မှာ တူညီတဲ့ pod လေးတွေ deploy လုပ်ထားတယ်။ တူညီတဲ့ pod တွေဆိုတာ mornitor လုပ်မယ့် pod, log collect လုပ်မယ့် pod, nodes အချင်းချင်း ဆက်သွယ် ဖို့အတွက် ကူညီ ပေးတဲ့ pod စသည်ဖြင့် deploy လုပ်ထားတာကို ဆိုလိုပါတယ်။ 

                    အောက်ပုံမှာဆိုရင်  kube-proxy, flannel services, kube-keepalive-vip စတာတွေက daemonsets ကိုအသုံးပြုပြီး  deploy လုပ်ထားတဲ့ pod တွေဖြစ်ပါတယ်။ Cluster အတွင်းကို node အသစ် ရောက်လာတာနဲ့ daemonsets pod တွေက  new node ပေါ်မှာ create သွားဖြစ်မှာ ဖြစ်ပါတယ်။ အကယ်၍ node delete ဖြစ်သွားရင်လဲ auto delete ဖြစ်သွားမှာ ဖြစ်ပါတယ်။


So, how does daemonsets make sure its run on every nodes?

                Documentation မှာတော့ kubernetes v.12 မတိုင်ခင်အထိတော့ deamonset pods တွေမှာ node ကို manual define လုပ်ပြီး default scheduler ကို မသုံးပဲ bypass လုပ်ပြီး အသုံးပြုပါတယ်။ v.12 နောက်ပိုင်းမှာတော့ အရင် article တွေမှာ ပြောထားတဲ့ node affinity နဲ့  default scheduler ကို သုံးပြီး nodes တွေပေါ်မှာ run စေပါတယ်။ More on ref : https://kubernetes.io/docs/concepts/workloads/controllers/daemonset/

Let's demo on daemonsets 

            demo အနေနဲ့ nginx pod ကိုပဲ daemonsets အနေနဲ့ ပြသွားပါမယ်။ Kubernetes documentation မှာလဲ​ daemonsets deployment ကို ကြည့်လို့ရပါတယ်။ kubectl create command ကို သုံးပြီး deploy လုပ်ပါမယ်။ ပြီးရင် kubectl get ds command ဖြင့် daemonsets pod status ကိုကြည့်လို့ရမယ်။ --all-namespace ဆိုပြီးတော့လဲ namespace တိုင်းမှာ ရှိတဲ့ daemonsets pod တွေကို ကြည့်နိုင်ပါတယ်။


        Ok, ဒါကတော့ daemonsets အကြောင်းလေးပဲဖြစ်ပါတယ်။

That's it 😊

Pls Like and Subscribe Our Root Of Info FB Page and Youtube Channel


Thank you!!!


Share: